Posted by dravon in Education & Instruction, Featured, Pipeline Update | Comments Off on Easy Matching of Embroidered Pieces
Easy Matching of Embroidered Pieces

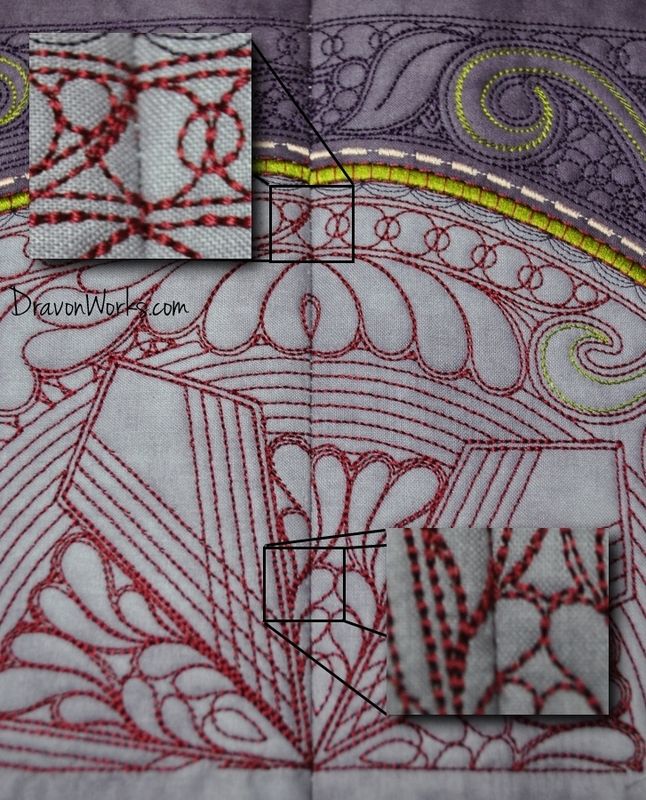
There are a variety of different Block-Of-The-Month quilts available which are composed of individually embroidered squares. The example I’m using for this tutorial is the one from HoopSisters for their 2014 offering called Jacobean Journey. I’ve talked a bit about this here, but it’s mainly a color test. The first few months of blocks form the inner core and it’s pictured here while the second set is pictured here.
I’ve now finished embroidering all the core blocks and I’m about to start embroidering/piecing all the border sets – starting with the inner. Before I proceed with more embroidering, I decided to assemble the core in its entirety.
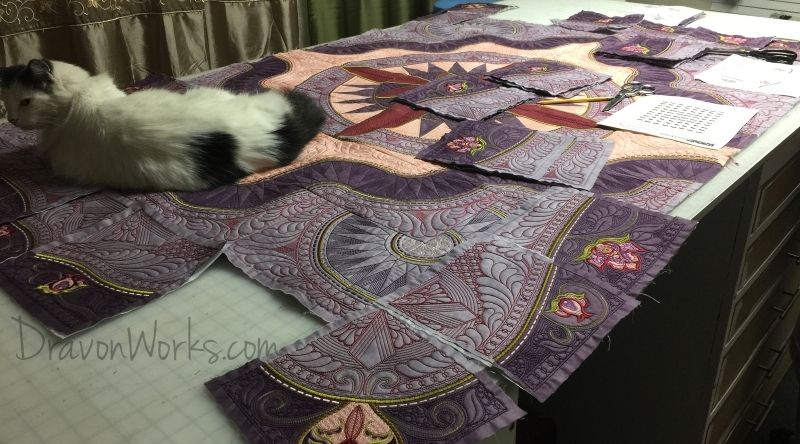
Above I’ve laid out the part that was already assembled and now I’m fitting the new squares into place following the diagram. Of course, Wedge my trusty Sewing Room Helper just has to be present to make sure I get everything right.
I’ve already assembled about 20 some blocks before this point, and I’ve learned through trial and error how to line these things up for the best end result with minimal effort. As I’ve said before, I’m a lazy sewist but I’m also very demanding – so I want it as perfect as I can get it with the least amount of effort. Everything I do is therefore an experiment in figuring out the best way to do just this. I came up with a system that works really well for me, but it never really crossed my mind to share it. A friend was helping me assemble these, and in the time that I put together a series of 8 she was still struggling to put together the first pair.
Rather let her continue the exercise in frustration, I showed her my process. She followed it and on the first try, near perfection! Suddenly it dawned on me that this might be something that would be worthwhile to share. So here it is, my method for joining embroidered quilt blocks.

Step One. Identify the blocks that have to be joined and visually confirm that if these were aligned perfectly the design would look continuous. If your blocks have a basting stitch around them, and this one definitely does, I’d recommend removing it before starting. If you choose not to, that’s fine but make sure that you IGNORE the basting stitch when it comes to trimming and aligning the blocks. Again, IGNORE the basting stitch. It is not the edge of the block – the embroidered pattern is what defines the edges of the block.
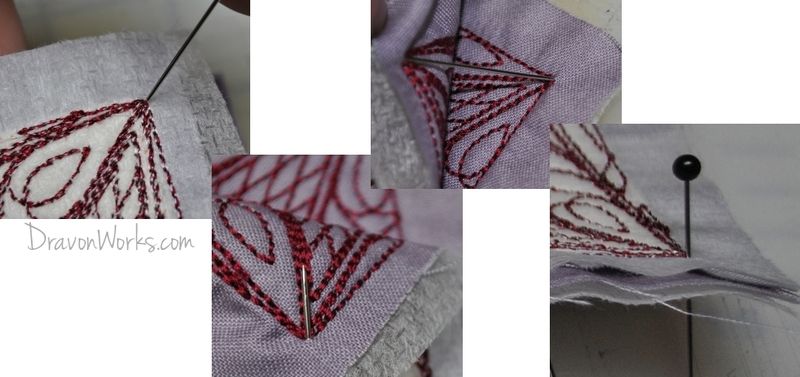
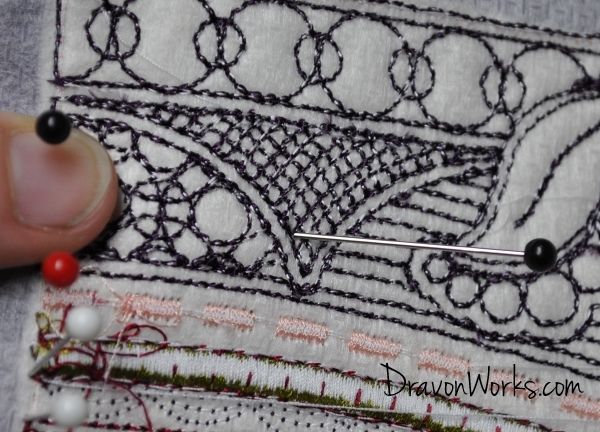
Step Two. With the blocks laying right sides together and oriented correctly, put a pin through the corner stitches on one block, then align the pin with the corner stitch on the next block. You’ll push the pin STRAIGHT through. This is an alignment pin, not a basting pin. Again, do NOT try to use this pin to secure the corner. Push the pin straight through.
Step Two Continued. Repeat the process of pushing a pin straight through both blocks aligning the design together by matching the ends of the stitched design. You’ll do this along the entire length of the side to be sewn. Once you do this a few times you’ll find this is actually a very fast process. Again, push the pin straight through.
Step Two Finished. When you’re done, it should look like this. See all the pins are straight up and down? (for the most part)
Before proceeding, especially when you’re first putting this into practice, you might want to double check the alignment by carefully opening the aligned blocks. The stitched design and fabric color changes should align.
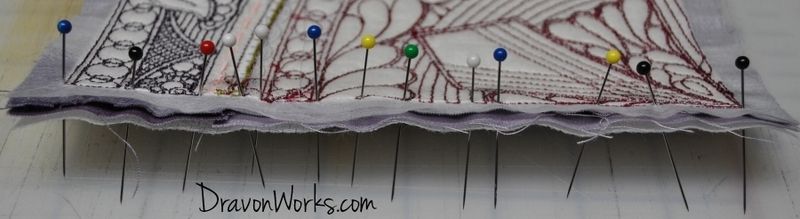
Step Three. Now for the actual pin basting. With the alignment pins still straight up and down, hold the material securely with one hand while using the other hand to insert a baste pin. This ensures the alignment is preserved and the process of angling pins through the material doesn’t mess that up as long as you’re holding the blocks.
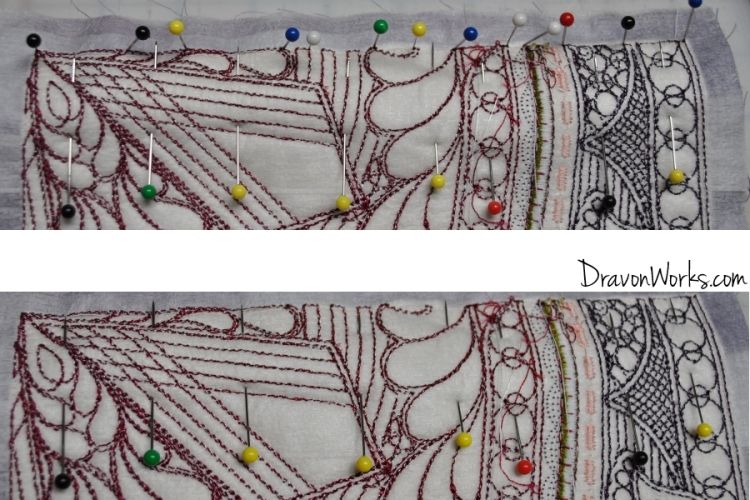
Step Three Finish. So when you’re done with the placement pins, you’ll still have all the alignment pins in place. At this point, they have done their job and can be removed.
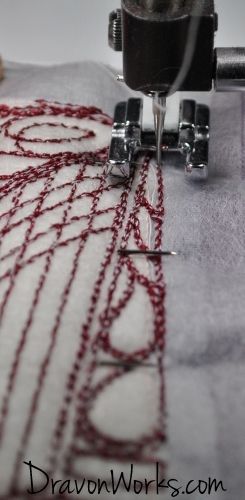
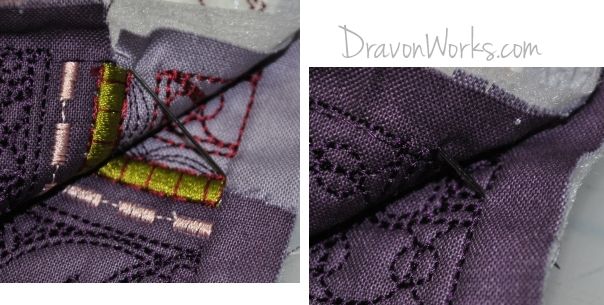
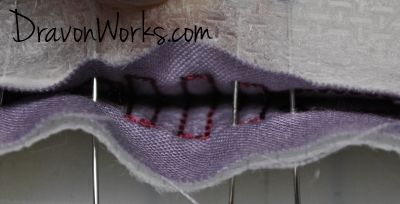
Step Four. Now it’s time to sew them together. I like to use an open toe foot for this so I can clearly and immediately see exactly what I’m stitching, but it’s not a requirement. Use whatever foot you like, but you are using a straight stitch. What you are targetting is to sew directly over top of the aligned very edge of the stitches. See how the needle is literally going through the edge of the design stitches? If you sew on the inside or the outside, the final alignment won’t look right.
HINT: Learned this the hard way. If you have batting on these, or in the case of the HoopSisters quilts their Battlizer, then you’ll want to sew along the same line of stitching but just to the outside. I trim away all batting and leave only the quilt fabric and the thin stabilizer since I like quilts to be soft and drapey, but early on I had a few blocks with the batting still present. With this extra thickness, I need to sew to the outside of the target line to allow for the extra thickness in the turn. Sewing right on the stitched lines makes the design appear misaligned since too much of the block is consumed with simply opening up the squares.
Step Five. Now pull out the baste pins, open up the seam and take a look. It should be pretty darn good looking! If you’re being really picky, you can pull out any non-aligning pieces and restitch just that section. My friend was thrilled with the results of just her first stab at this process and the more I do it the faster it gets. I can pin and sew a set of blocks in just a few minutes, as compared to the half hour it took me at the beginning! *raises arms over head* Lazy for the win!
I have another friend who invested all the literally hundreds of hours into making this quilt, but when it came to the actual assembly it didn’t turn out as well as it could have (see the thickness hint above!). *sad panda* I figure if I’m going to invest all that time and money, I’m going to be super picky about the assembly – the lazy way. 😉 The final result will look all the more amazing for it!!
I hope you find this useful. If you give it a try, please let me know what you thought of the results and give this post a Like or Share. If you’d like to see a lazy way to do something which ends up looking amazing, just ask me. I’m more than happy to experiment!
Until next time, Happy Sewing!
– Dravon


