Posted by dravon in Pipeline Update, Project Review | Comments Off on Gift Art Quilt Post-Project Review
Gift Art Quilt Post-Project Review

It’s finally time to complete the Project Review for the gift art quilt that I created last year. You can see some of the Pipeline Progress reports on it here and here which talk about the design and early stages of the layout challenges as well as early embroidery techniques.
The quilt featured a number of experiments in it, both in terms of quilting techniques as well as embroidery applications. I’m thrilled with the outcome of pretty much all of them!
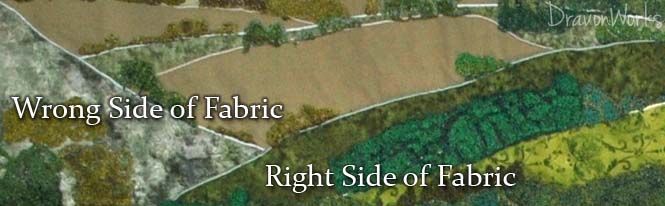
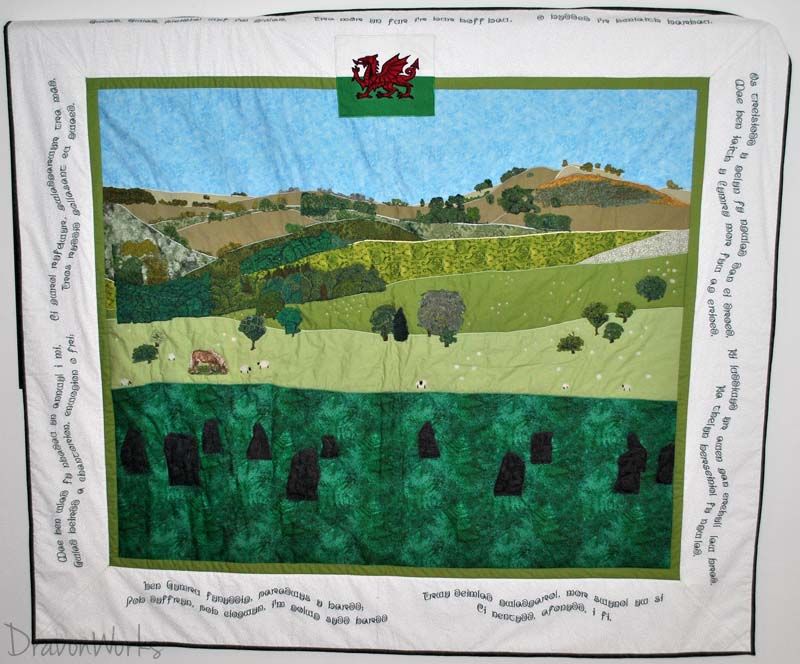
Layers of Mountains. While I had a good selection of greens for the various layers of mountains in the background, when I was laying it out I realized pretty quickly that I wanted more .. but I really didn’t want to go get more. As I was pondering this, I glanced over at the stack of fabrics and saw the wrong side of one of my favorites. *ping* Of course! I’m not limited to using just the right side! So I used the wrong side of some to give more dimension and visual variety without using too many different patterns.
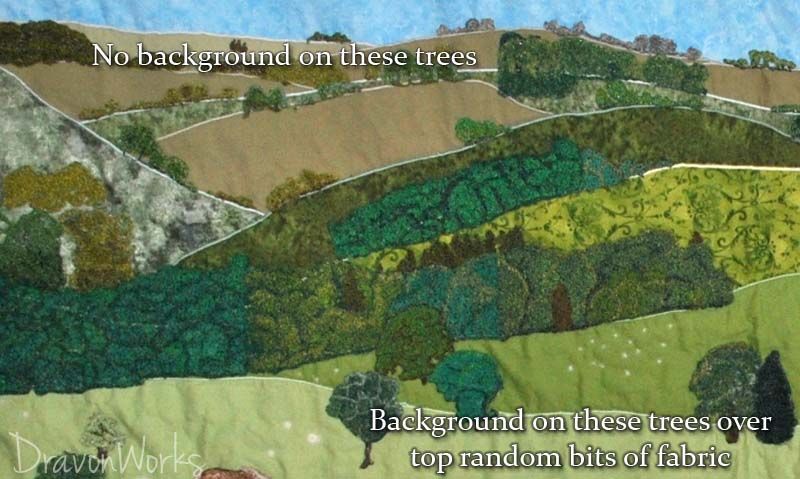
Forests. In the background of the quilt, I digitized individual trees or small copses of trees. These were done with circular loops layered over top of each other and stitched onto netting. Once they were completely finished, they were then attached to the quilt layers. I already covered the particulars of this precess in another post.
But the forsests in the mid-ground were huge clusters of trees, with not too many individual trees standing out sharply. I decided to expand on the successful approach used for the above individual trees which are in the way background. To give these closer-up trees a bit of visual variety and texture, I chose to literally chop up the fabric into tiny bits, contain those under a layer of netting, and then embroider on top.
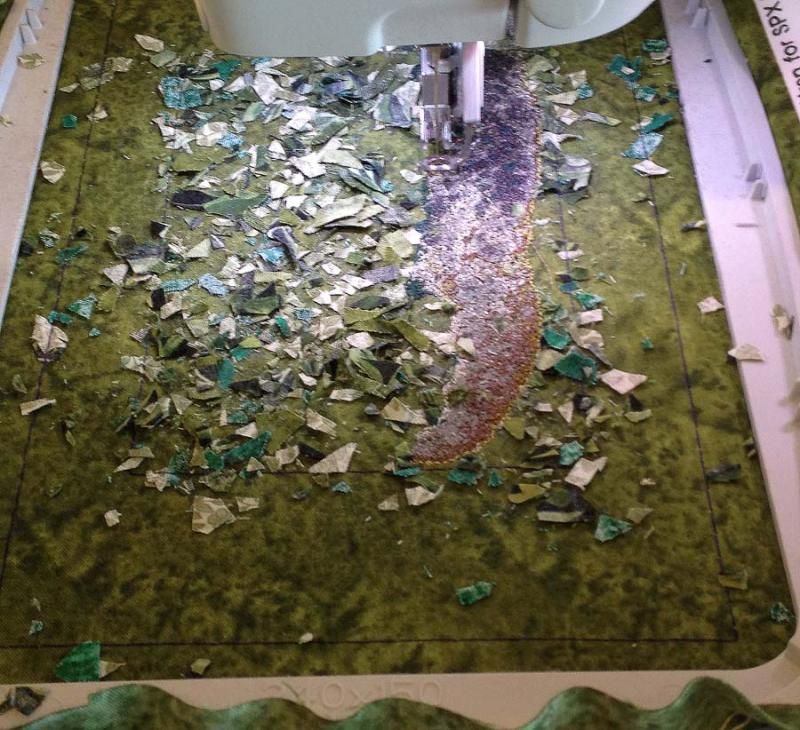
I picked different background fabrics for each of these clumps of trees, depending on the mood of the forest in the photos that I was trying to recreate. In the picture above, it was a darker forest so I went with one of the darker background fabrics.
You can see the bits of fabric that were scattered over the top of the background fabric in the photo above. Over top of this is layered the fine net which held the bit in place. As they were embroidered over, with the vibrations of the needle repeatedly puncturing the material and the hoop moving, the bits were bouncing all over the place underneath their netting. The result was an unpredictable forest, random fabric poking through like wild leaves, and lots of character and shading. I loved the results!!
I used this same approach for the bigger, individual trees in front of the mid-ground. Overall, I liked the effect. I think I did too much embroidering over the bit of fabric bits though, they didn’t quite have the full impact that I wanted on these individuals. It’s definitely an effect to keep in mind and try again for something else.
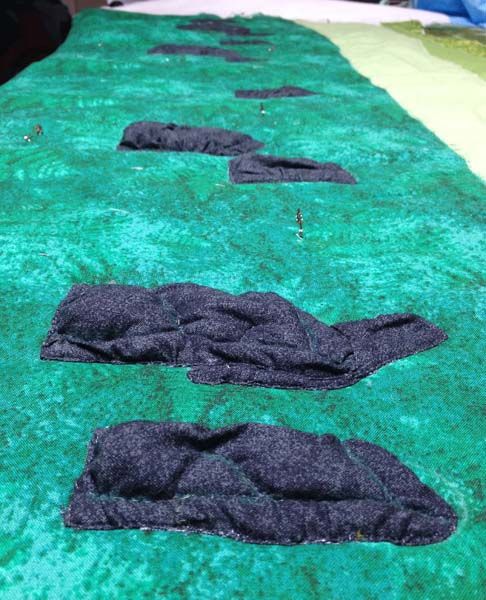
Standing Stones. The school yard actually included Neolithic Standing Stones. For real. They were about thigh and waist high and made of a distinctive black stone. I decided for these guys I wanted to have something a bit dramatic since they were the foreground of the quilt. Not only were they the singular most distictive aspect of the quilt, they also symbolized the rich history that the person I made this for was so very proud of. I really wanted the Standing Stones to reflect that vibrant character. I found the perfect fabric, but having flat stones just wasn’t going to cut it. I decided to try some trapunto — which is stuffed quilting. I created two layers of these stones. One layer was the flat background which gave me the shape and layout. These were applied with heat-n-bond ultra.
Then I created another copy of the same shapes with about an additional 1/2 inch of fabric added to the edges. The edges were turned under and then I very slowly free-motion stitched each stone on top of the background of the stone, making sure the edges lined up and letting the fabric crumple and pucker as it wanted to. After that, I cut a hole in the back fabric and stuffed each stone with wool.
Once each of the stones was stuffed, I then went back over each one and put in the contours with free motion. Now all through this, I’m examining the photograph on which this was based, making sure the get the lumps and lines and everything as close as I could. Overall, I was completely thrilled with the end result!!
Sheep. Wales is well known for its sheep. The mid-ground photo featured lots of sheep, and I wanted to make sure sheep littered the quilt as liberally as they did in reality. But how? I thought on this one long and hard. Fortunately, I worked at a sewing machines sales shop at the time and learned of a machine I’d never heard of before — an embellisher. Instead of one needle, it has 6 to 12. It’s designed to create instant needle punch felt. Perfect!! I bought one of these specifically do make the sheep on this quilt. heh. Being a spinner, I had already had some nice wool roving. For the sheep in the background, I took a tiny bit of the fibers, balled it up, and then needle punched it into place. CUTE!
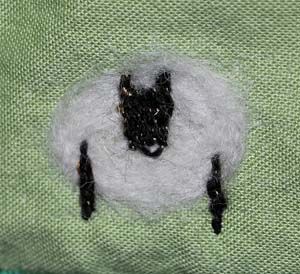
For the sheep closer to the foreground, I used a bigger ball of wool. But the sheep in the front of the mid-ground were close enough to see little legs or heads on them. Hrmmm. I found some spiffy 30 weight wool thread, used a top thread needle for the huge eye to prevent shredding, and then free motioned some little legs and heads on them.

I even made a few face the viewer and a couple face away. This little guy below was dubbed the bulldog sheep. hahaha. I think he’s absolutely adorable!! But that embellisher was utterly perfect and did precisely what I envisioned. The sheep turned out wonderfully. Now I have this machine. Need to figure out what else I can do with it…
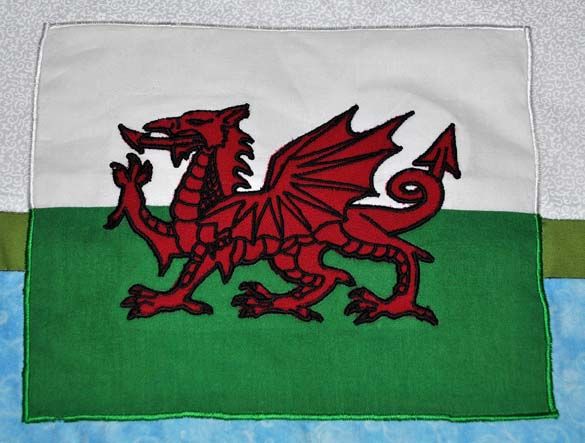
Flag of Wales. For the flag in the top center, I tried some experiments with the distinctive dragon — including trying my Sillouhette plotter to precision cut the fabric. I ultimately decided on an applique using a heavy twill for the red dragon which I had to cut by hand. The end result of the flag looked awesome.
Borders. One of the huge things that the intended recipient of this gift does is sing. Apparently singing is also a major Welsh thing too. She’s particularly fond of the national anthem and is proud of her native language. After discussing some design ideas with a friend, it was suggested that I digitize the national anthem, in Welsh, and use that to frame the entire quilt. Perfect!! I must admit, I was really nervous about trusting a site to give me the right words. Turns out there are 3 verses plus the chorus. Perfect! I had 4 sides of the quilt. Once I got the right words, I had to figure out fonts and spacing. I tried multiple permutations and then printed out in real size the final proof. I chose the wavy as a way of adding motion and implying music without adding musical notes.
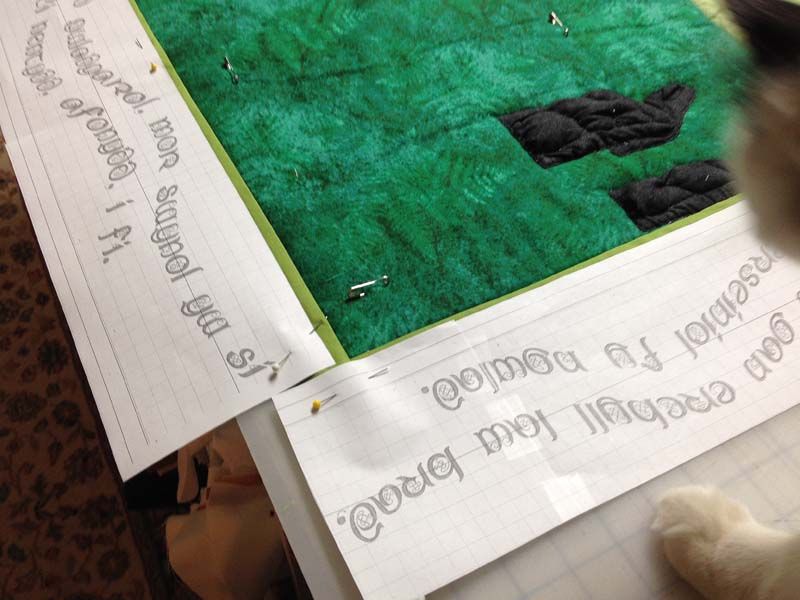
Wedge, my sewing room helper, had to put his two cents in as well. He was all over this! I couldn’t get a single picture of this part that he’s not in to some degree or other. You see his little paw in the bottom right here. With his help, I eventually got everything spaced and arranged just right. I decided to put the 3 verses on the sides and bottom, with the chorus running across the top. Printing everything out life size turned out to the be key for success here. I’ll have to remember to do that again when I need it.
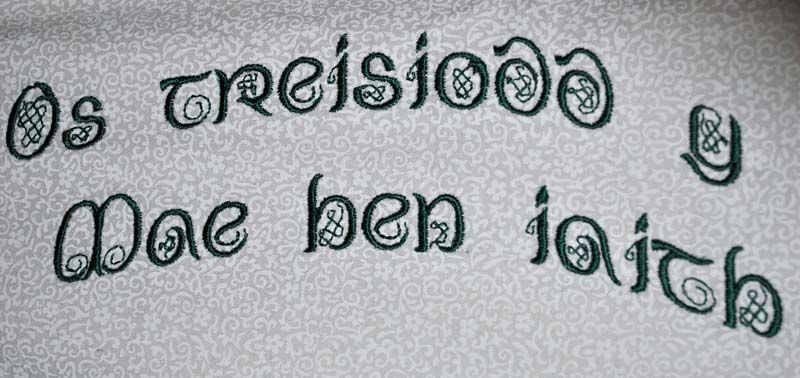
I took the massive design into another module of my software and then split it up across multiple hoopings. This was another new thing for me, but it turned out beautifully!! I chose a font with lots of scrollwork in it and chose a green thread for the lettering to echo the many greens of the landscape as well as the flag.
Quilting. Once the whole thing was assembled, how to quilt it?? That one has stumped me. I did some basic quilting, enough to make sure everything was stable, but it needs more. Exactly how to quilt it has eluded me … until very recently. Along the white background border, I’m going to use my Pfaff’s custom stitch capability to create a daffodil and then sew daffodil outlines around the words. The daffodil is a national flower of Wales and also the flower of St David. I’m going to make them white thread on a white background, so they blend but are distinctive enough to be visible at close range.
The recipient of this gift has a very unique way of seeing the world, and a quite magical way at that. She would often ask if “that noise” (the wind through a window crack, pipes pinging as they heated or cooled, etc) was something like ghosts, or lost spirits, or a dragon snoring in the mist. This perspective is wholly unique to her, and it suddenly dawned on me how to quilt the body of the piece. With hidden magical creatures! Put a sleeping dragon on the mountain. Fairies peeking around the Standing Stones. A flying dragon in the wind. Things like that hidden in the free-motion stipple quilting so that only the truly observant of the magical world around us can catch a glimpse of it. She’s off at college right now and has the quilt with her, but I’ll see if I can borrow it to finish the quilting which will put the cherry on top.
Overall, I’m quite thrilled with the quilt. It was fun to design, and fun to make. I think finally being able to add the appropriate quilting will make this quilt officially “done”.
Now on the to next project — a pair of leather german pants. With codpiece. hehe. What projects are you working on?? Have any questions on this project you’d like answered? Or maybe a question on a project you’re working on that this quilt touched on? Feel free to leave a comment, share this post, or ask questions.
Until we meet again, Happy Sewing!
– Dravon


