Posted by dravon in Education & Instruction | Comments Off on On Twin Needles – Threading the Machine
On Twin Needles – Threading the Machine

In the last post, I talked about the fact that pretty much every machine can use twin needles. In this post, I’m going to talk about how to thread the machine with 2 different threads.
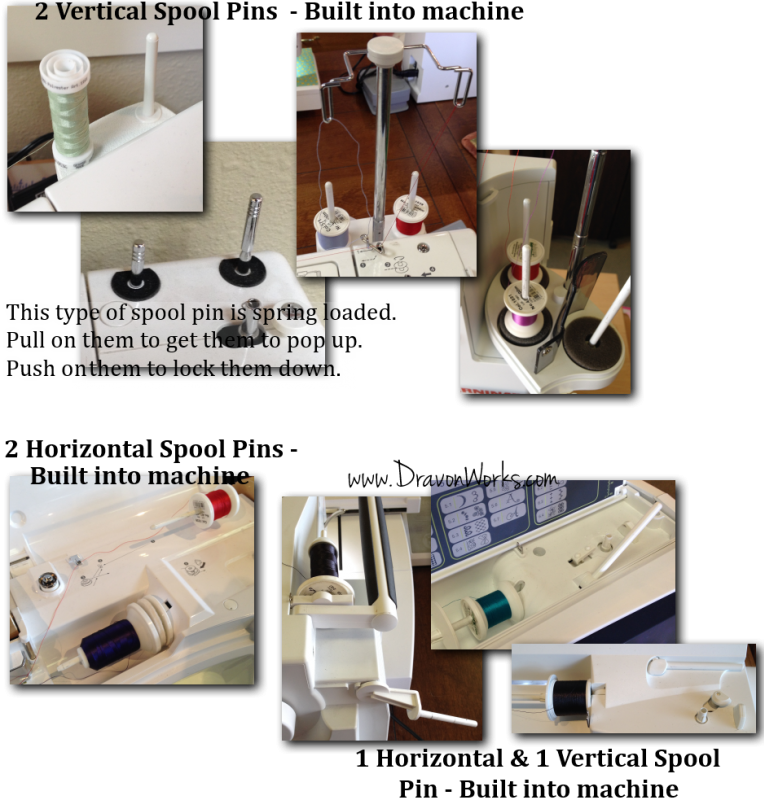
The first thing you need to look for on your machine is the second spool pin. What’s the spool pin? It’s the thing that you put your spool of thread on when you’re sewing like normal. For this second spool pin, there are 2 main types. One type is the “add-on” spool pin. When you look at your machine, you’ll see some sort of shaped hole where the spool pin will be inserted. Some are circular with a little sort of star pattern, and others are simple squares. If you do not see this, then the additional spool pin will be mounted onto the bobbin winding pin. See the picture below for examples of a variety of machines with additional spool pins.

There are also machines where the additional spool pin is attached to the machine. Again, there’s no standard which applies to every single machine of every single brand. I walked around the store and got pictures of all of the different types that we had. They pretty much fell into 3 categories — both spool pins stand up, one spool pin stands up and one lays down, and both spool pins lay down.
If your machine doesn’t have an additional spool pin, or you’ve lost or broken it off, never fear! T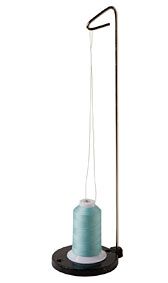 his is where those individual thread stands are perfect. They are very reasonably priced, and I use mine all the time — most especially for bobbin winding. I have a spool of bobbin thread on this and keep it handy so that I don’t have to unthread my machine to wind a bobbin. For double needle work, set your thread stand behind your machine near the spool of thread which is on the machine and then thread.
Once you have identified your second spool pin, wherever it happens to be, you’ll put a spool of thread onto each pin so that you have 2 individual spools of thread on the machine. If you want them to be the same color but don’t want to buy a second spool of thread, you can wind a bobbin and use that as the second spool of thread.
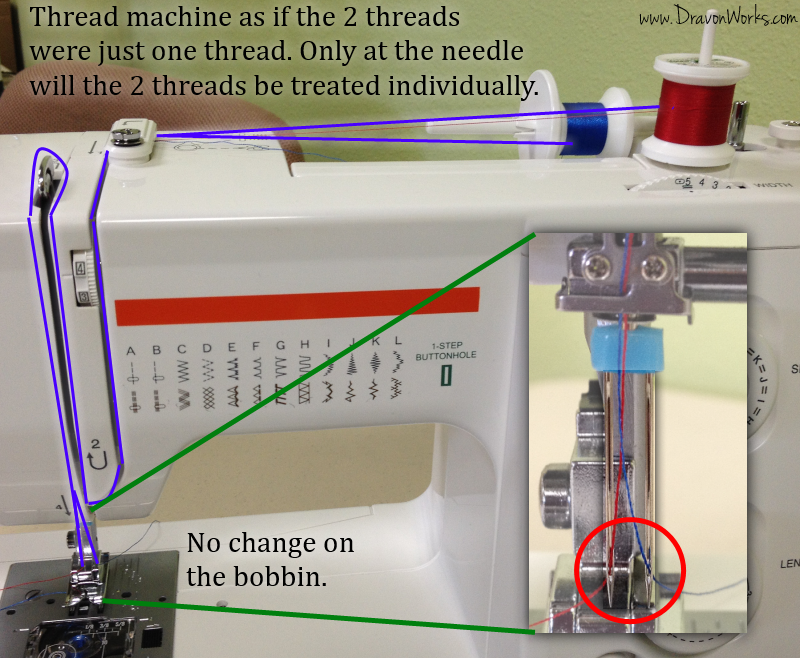
Once the thread is on your machine, you’ll take both the individual threads and treat them as a single thread. Now thread your machine normally. Yup, normally. The only time you’ll divide out the threads individually again is when you’re ready to thread the eyes. See the picture below.
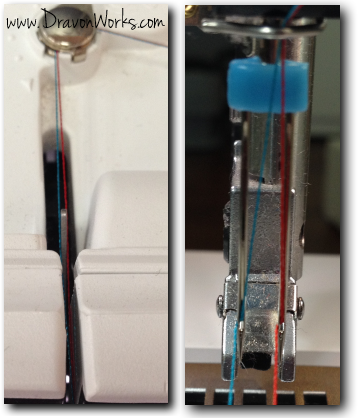
Some machines have a sort of disc thing you can easily see near the tension discs along your thread path. IF, and I do mean IF, you can see these, there is an alternate school of thought for how thread those machines. If I can see that, I put one thread on one side of that disc and put the other thread on the other side of the disc. Which ever side I threaded the disc, I’ll thread the appropriate needle. In the picture below, I put the blue thread on the left side of the disc and into the left needle, while the red thread went to the right of both the disc and the needle. Otherwise, I still thread the machine just like normal. Just … like … normal.
How easy is that?? I’ve had folks incredulous over this. “You mean the threads don’t get tangled?” Nope, they don’t. The only you cannot do is use any sort of the built-in threaders that are on many machines. You’ll have to thread these needles the old fashioned way … by hand! For those folks who have machines like the new Bernina 800 series or the Baby Lock Ellegante where the auto threader does more than simply put thread through the eye of the needle, there are directions for how to do this with double needles in the owner’s manual.
Oh, and there’s nothing special you need to do for the bobbin. No second bobbin or anything.
There you go. Now you’re all set to play. You know that you put these needles into your machine just as you do any other needle. You know to make sure that the needles safely go through the wide hole in the stitch plate. And now you know how to thread up the machine with 2 threads of similar weights. Next up? Fun things you can do!
Until we meet again, Happy Sewing!
– Dravon


No Comments
Trackbacks/Pingbacks