Posted by dravon in LiveJournal, Project Review | Comments Off on Applique Flower Pillow
Applique Flower Pillow
Last week I took a class at the Quilt Emporium called Beginning Applique. That class taught us the basics of needle turn applique.
Step one of the process involves using clear vinyl (I used the fronts of those clear vinyl things you get when you buy sheets or curtains). You tape the vinyl to the finished template and use a sharpie to copy the pattern onto the vinyl. Make sure that the center vertical and horizontal lines are included, for positioning purposes.
Step two involves making the template pieces into something a bit stronger than just paper. In class, the teacher used self-adhesive laminating sheets which she put overtop of the templates, then cut them out. Well, call me cheap but I’m not going to go buy those expensive sheets for a trail run and I didn’t have any cash to purchase a sheet from her. What I did instead was glued the uncutout template pieces to my manilla block paper, waited for that to dry, then cut them out. They worked GREAT.
Step three is where you cut out the fabric to be used. The template pieces do NOT include any seam allowance, so we traced the templates out on the wrong side of the fabric, then cut them while leaving a generous 1/4″ for turning.
Now we’re ready to start putting the piece together. Assuming that the center vertical and horizontal have been marked on the base material, this is where the vinyl positioning template comes into use. Pinning it down, position the applique piece to be worked on and then pin it in place. Remove the vinyl, then using the tip of the threaded needle, turn under the appliqe seam allowance and begin stitching it down.
The pattern she had us working on in class was a classic 4 tulip circular pattern. I was picturing doing another pillow project for Shelley but didn’t think she’d really groove on the pattern provided. Since it was a short class, I didn’t have to do too much on the practice pattern but I did enough to get the teacher feedback that I needed. I then came home and talked to Shelley about the project I wanted to do. She was excited and showed me a DeviantArt image she really liked. I said that if she can redraw that into a simpler shape for me, I’d use that. She did and I converted her custom artwork into the pattern pieces I needed.
While at Joanne’s, I found some awesome pink piping that would work well. I hadn’t done piping in a long time and figured I could use the practice and it would really help finish off the piece while adding some more color. Overall, I think the project came out very nicely. It took me about a week to applique all of the pieces down, and while it’s far from perfect, the project did as intended of giving me enough practice to figure out what I was doing.
Here’s the finished pillow:
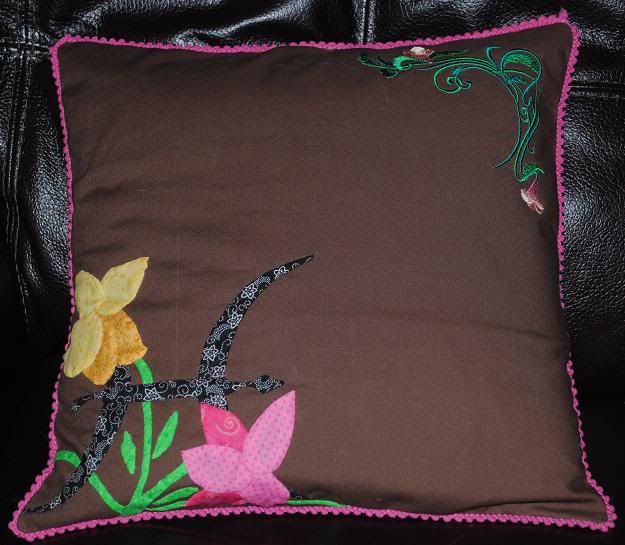
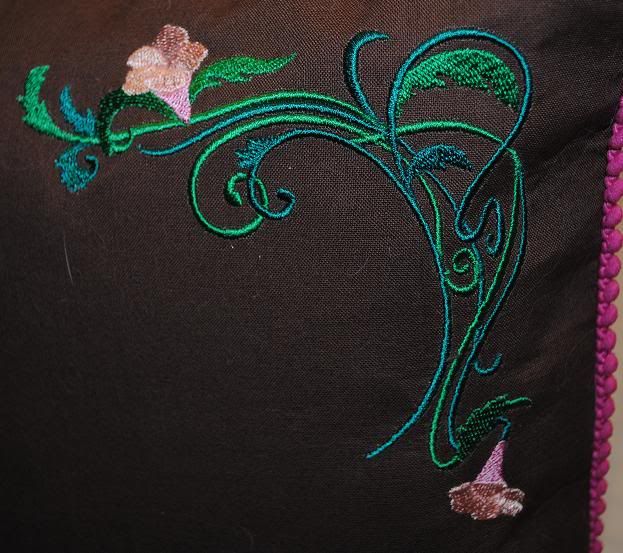
You can see in the upper right corner is an embroidery which we got from Embroidery Library. Altering the colors to suit the design of the pillow, it came out pretty well. I forgot to use the trick of adding the wool to the stabilizer, which disappointed me that I’d forget that so quickly. Oh well. It’s still nice.
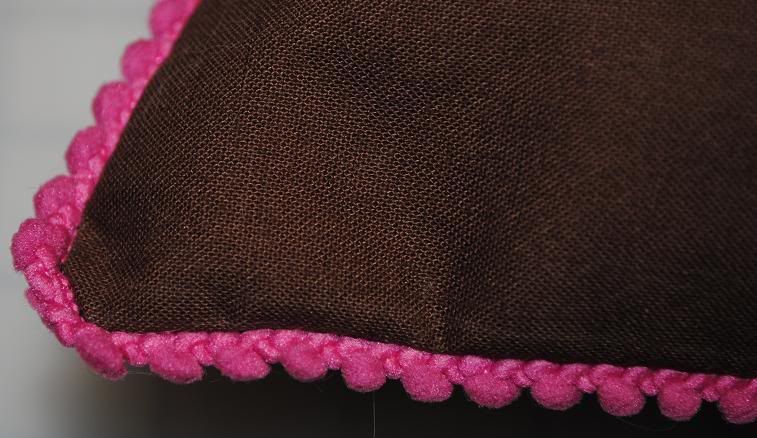
As mentioned, I found this pretty border and was able to use the mega piping foot on my machine. That foot worked BEAUTIFULLY and made including the edging a breeze! I’m thrilled to pieces with the foot and the final look that it produced.
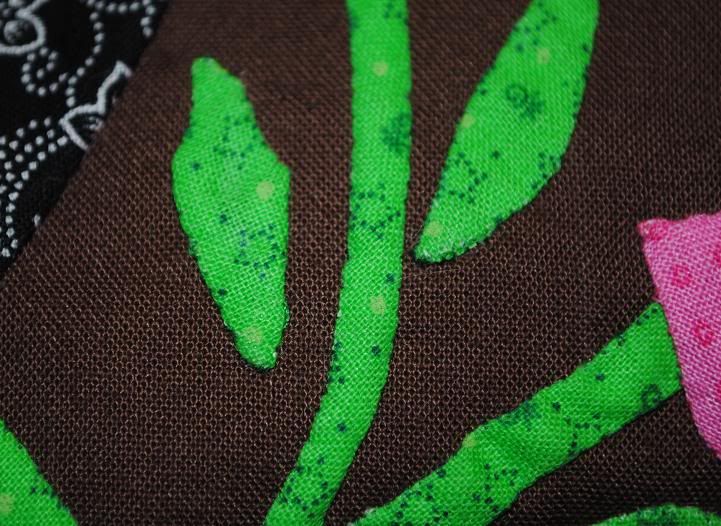
The applique itself features a couple of hibiscus flowers surrounding the astrological Pisces sign. After I’d finished it, I found a book in Quilt Emporium this morning specifically on appliqueing of wild flowers. Some of the finishing touches the author used really made the flowers come to life, so now I’m looking at these and frowning. Maybe someday I’ll get the gumption to put a few of those finishing touches onto this pillow, but until then, this is the finished desgn.
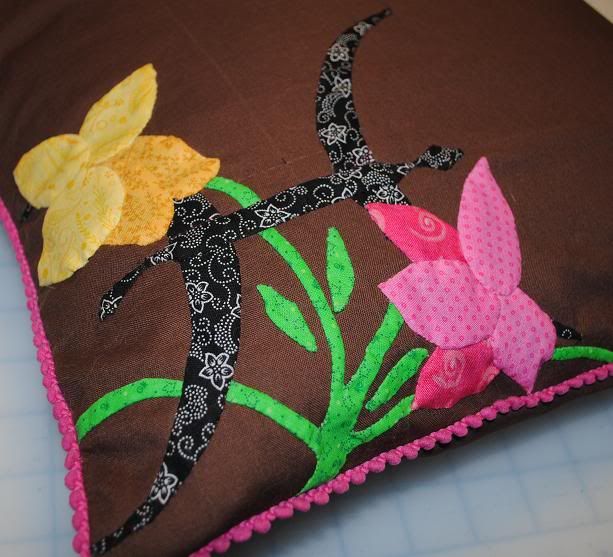
While the composition of the piece looks fine, in comparison to the vinyl template it’s a bit strethed in all directions. That’s invisible, but the ugly leaves … not so invisible. When not on the bias, trying to turn under the seam allowance and getting a smooth resulting line is hard! On these leaves, it was nearly impossible. This was able a good ten minutes of fighting with the piece until the seam allowance was dangerously frayed. Eventually, I just had to say “it’s a design feature” and move along. I started to do better on the petals, so it’s a learned thing and it was a large enough project that I did start to learn it.
Overall, I think the pillow is cute and I love the pink edging. While doing this project and the Block Party samples, I leaned that applique is not really my thang, but I’m glad I’ve done it and understand a bit about what goes into it.

