Posted by dravon in LiveJournal, Project Review | Comments Off on Embroidered Tunic
Embroidered Tunic
My goodness a cheer of celebration arose when I FINALLY finished this baby!!! The material was purchased back in like 1999 or 1998, and the pattern (Medieval Miscellenea Period Patterns #16 – Tunics 650-1310 AD, Tunic # VII). I screwed up and used this lighter color linen instead of the chocolate brown that I was supposed to use, but by the time I figured that out it was too late. Oh well, next time I’ll take better notes as to the intention of the materials that I am buying. Now to make a white undertunic for this one and I still have the chocolate brown linen for something else.
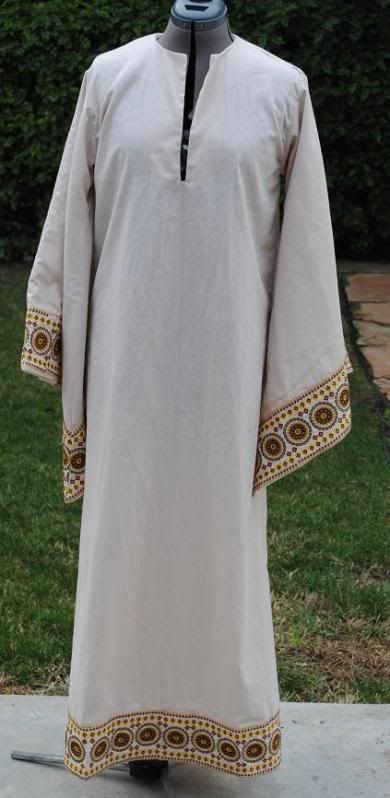 * *  |
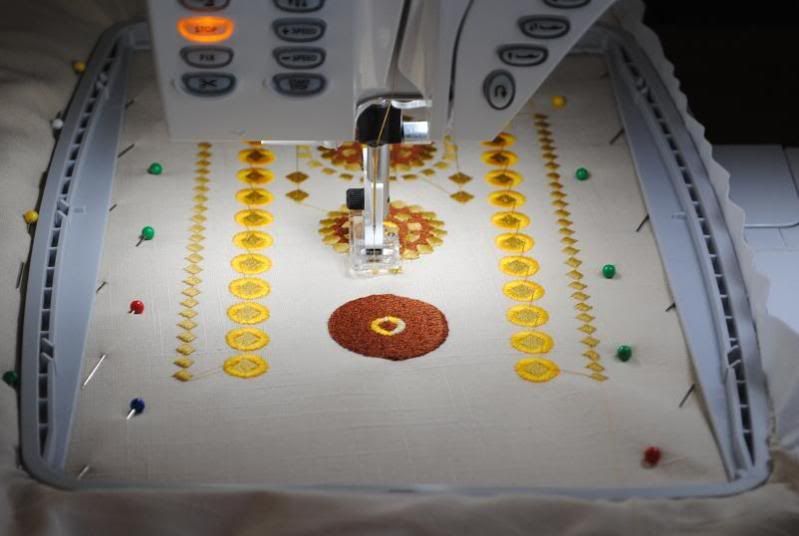
The pattern and material were cut out in something like 2004. I remember because I was working at the kitchen table in the apartment in El Segundo. I had this vision of what I wanted, but I didn’t have the machine and so it was partially assembled and then put away. The following year I got my first embroidery machine, and this project was again pulled from mothballs. After choosing a nice pattern consisting of geometric shapes (something close to 12th century standards, but certainly not period correct!), I began embroidering the sleeves. Much to my consternation, each set of 3 base circles took roughly 4 hours to embroider. Ugh.
With every project, there are always learning goals that I have set for myself. Success of those goals is relative to the difficulty of the project, and the goals that I set for this project were perhaps overly ambitious as a starter. The goal was to learn how to line up multiple individual embroidery designs to create a continguous line. In this case, I was lining the cuffs of the sleeves as well as the entire hemline. I had wanted to modify the design so that I could do the neckline too, but that proved beyond my skill level at the time and so I’ll leave that for another future project. With regards to my goal, I learned a whole lot!
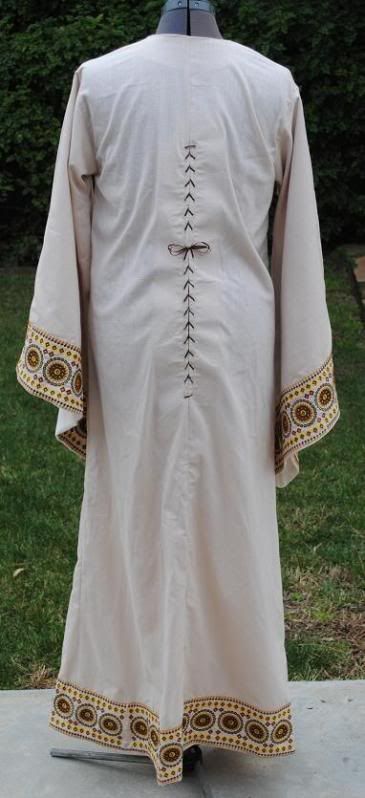
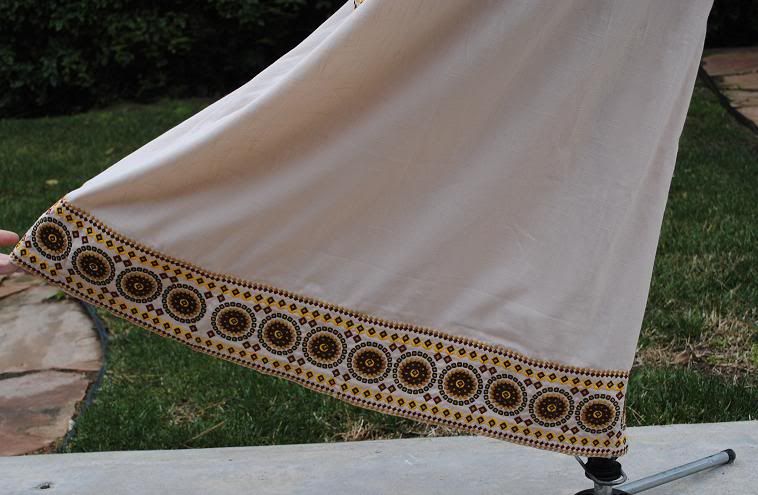
First off, this was a heavy design with intensive layering of threads. That means that the base material had to be stabilized all to hell or the material would contract too much, leaving the top edge looking beautiful and straight while the bottom edge was choppy in terms of a long straight line. You can really see that in the image below. Fortunately, by the end of the project I had figured out to resolve this problem and so the bottom edge of the hem is much better — though of course the curving hemline presented it’s own set of unforeseen challenges!
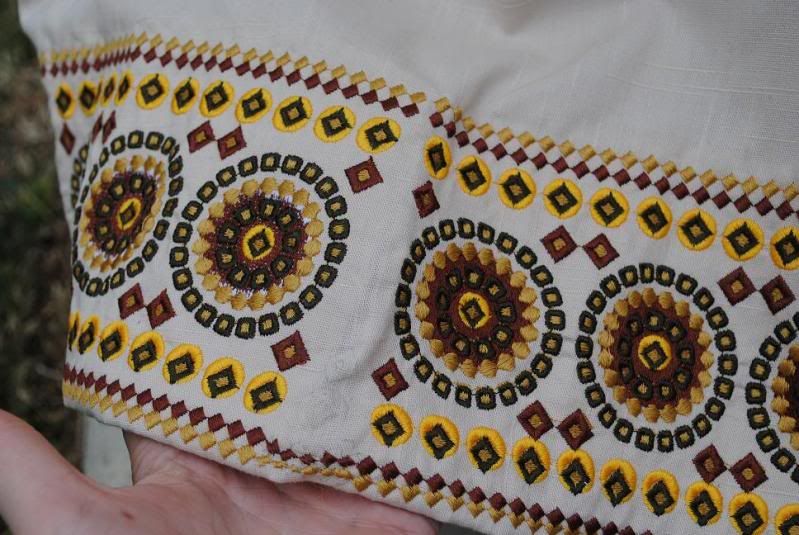
I also learned a great deal about the temperament of my machine. It can work for roughly 8 hours (2 designs) before it starts to get overheated (I dubbed this ‘getting tired’) and then everything starts snarling and skipping and breaking. If I did NOTHING else except turn off the machine and come back the next morning, it was a happy machine and embroidered beautifully. I also learned on this the importance of sharp needles!! I had no idea how much even a marginally dull needle contributes to breakage, birdnesting, and other sewing uglies. Eventually, I started to replace the needle with every new set of 3 circles. While the machine still got “tired”, the new needles went a long way to keeping the uglies at bay. I also learned that the machine needs to be babysat. You can see the missing sections of the little rectacles in the image above, and those are due to threads breaking while I wasn’t sitting there giving the machine the stink eye to make sure it worked perfectly. I later learned how to go back and pick up where the break happened, so you don’t see that mistake on the other sleeve or the hemline. I also learned that the tension can get screwed up if particularly ugly snarl happens, and in those cases you can see the white bobbin thread pulled up and into the design. There’s an image of the hemline in which the base circle has a lot of the bobbin thread showing and I failed to catch it quickly enough. All in all, I learned a shitton about machine embroidery and stabilizers. From the goal perspective, this project was a major win. Still have much more to learn, but many of the basics are down now.

The only part of this tunic that is lined is the sleeve, as you can see pictured above. This makes them very heavy, but I think they are quite stunning all things considered. When it was originally finished, the point of the shoulder was actually about mid-bicep. Yuck! Considering how heavy the sleeves are, this was just terrible looking. I had to remove the sleeves, cut off the overly long shoulder point and then re-attach the sleeves. Unfortunately, the design was the period-correct rectangle but I cut out the new armscye with the modern curved inset. Overall, it works and it feels fine to wear but that’s why there is so much torsion there in the image above. My bad! I should have found the new point of the shoulder and then cut a straight line down to the original armpit point, but noooo. I had to get all fancy and make it hard on myself. heh. Lesson learned!
I do so love that lining material though. Totally period incorrect, but pretty. At least it’s not lame’. LOL
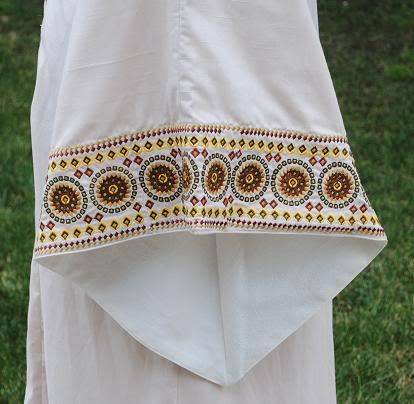
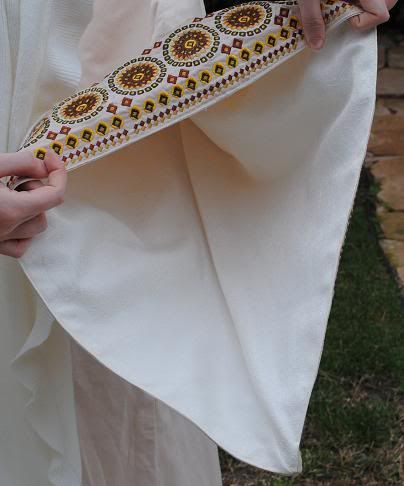
Now, the hemline lessons. As you can see from the above, the design is perfectly level. There’s no curve to it at all. That worked just fine for the sleeves, which were also perfectly straight. The hemline, however, curves. Most especially does it curve on the sides. While I was able to get the front of the garment to look pretty damn good, the challenges came when I started to hit the sides and back.
While I was able to adjust the design incrementally on the front and actually used the fabric shrinkage to my advantage, there were a few points where that was just impossible to maintain and I had to make a drastic alignment break in order to maintain the top line of the design. The image below shows the one remaining unfilled in break. The others were hand embroidered to fill in the gaps, and you can see where I’ve marked this one to be similarly hand embroidered as well as where I’ve put the base embroidered lines so that at least it’s not an OBVIOUS brea. I chose to leave it as-is, with the little circles absent, instead. My hand embroidery beyond sucked (as you can see by the strangled brown and gold rectangles along the bottom of the gap, and these were the good ones!) and I was rather agast in how terrible it was, so I figured I’d rather have this gap instead. I can always fill it in later if it proves bothersome to me. I have PLENTY of the thread left.
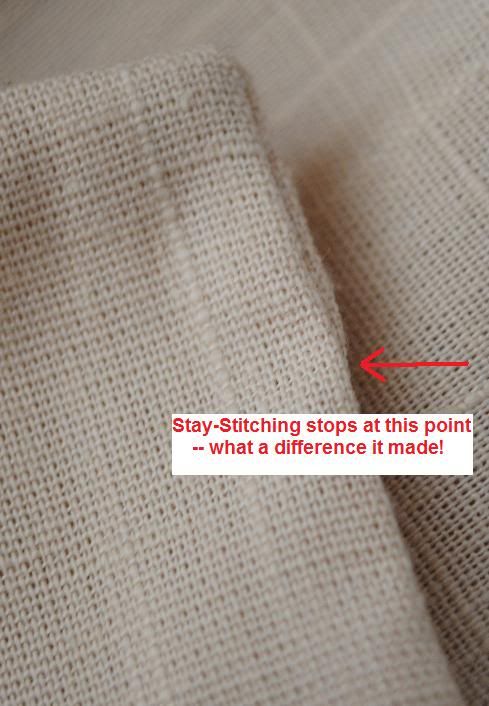
Embroidery part covered, I turn now to the neckline. Yick. The pattern REALLY should have called for some interfacing on the lining at least, because this neckline is floppy and blah. The image below is pictured after I put the stay-stitching in, and I was flabbergasted by how much of a difference just a simple stay-stitch made. It turned the neckline from “embarrasing” into “passably acceptable”. Not great, but ok. Well, other than it being a plunging neckline that is. LOL It requires that chemise for sure!
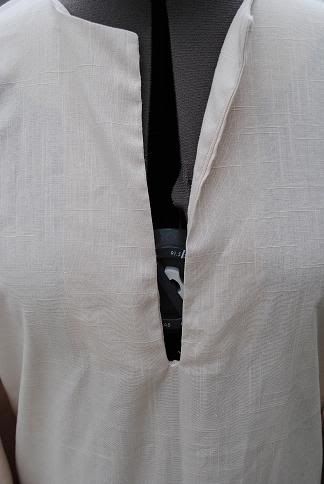
Here is at least my attempt to record exactly how much of a difference my new favoritest stitch made. it’s not great, and I know I bragged about this stitch in the gold/burgundy doublet post-mortem as well. I swear to you I think it’s the single most useful thing I learned from those classes! Anyway, on the second image — which is the front side of the neckline there at the top point — you can easily see exactly where the stay-stitch ends. From there up, the lining spills over and makes the finished look a bit slovenly. It becomes acceptable to me when that sloppy part is only 1 inch, rather than the entirety of the neckline that it was. Oh, and the hemline itself was hand stitched up, so that I wouldn’t be running a line of machine stitches through the embroidery.
 * *  |
All in all, I made plenty of the mistakes on this baby but in the end I’m thrilled with it. Heh. Took 10+ years to get here, with 5+ of those years in the WIP pile — but it’s DONE! YAY!!! M was a bit unkind to say that considering the number of other finished embroidery projects I’ve done, this is an $8,000 dress. *glares* Means I have to step it up and get to work. Now that I know everything I’ve learned from this project, it’s time to start doing the embroidered corsets that I planned on!! I also have the embroidery software so that I can create my own designs. Eventually, I’ll do the neckline and the center front stripe as well as the sleeves and hem, make that Byzantine dress I’ve been drooling over for a while now. hehe


