Posted by dravon in LiveJournal, Project Review | 3 Comments
Draping I Final Project
Fall ’08 semester I took a class on how to drape clothing. We were allowed to do anything we wanted but the project would be put into the fashion show so we had to design something “fresh and modern”. Well, I am soooo not a “fresh and modern” kind of chick, so I opted to design something with the following parameters:
(1) complicated, forcing me to make sure I draped precisely so that the pattern and final product tested this aspect
(2) use as much stuff from my stash as I could
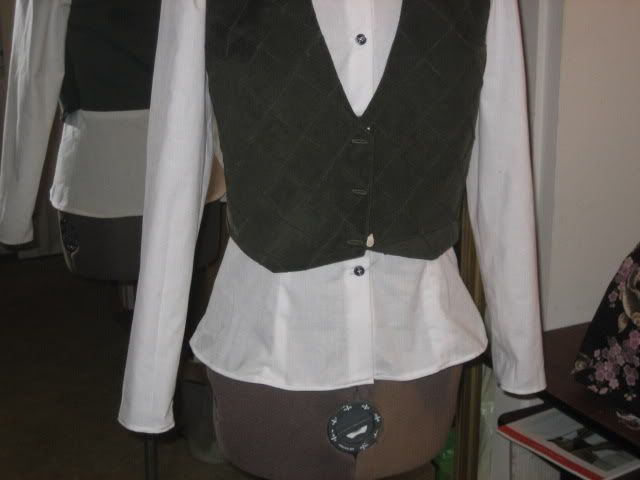
I chose to make a shirt with a princess seam line on the front with a built-in vest. The skirt is a 6 gore panel skirt with box-pleat kickpleats. The vest front and back along with the buttons on the shirt and vest all came from my stash. I had to buy new material for the shirt itself and for the skirt. Here is the final design all assembled and ready to turn in:
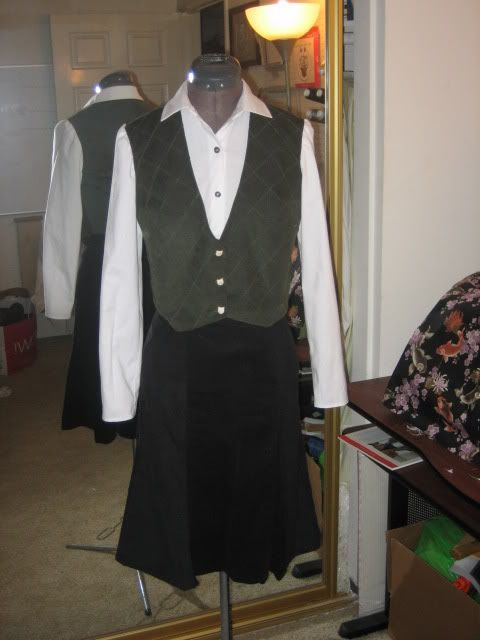
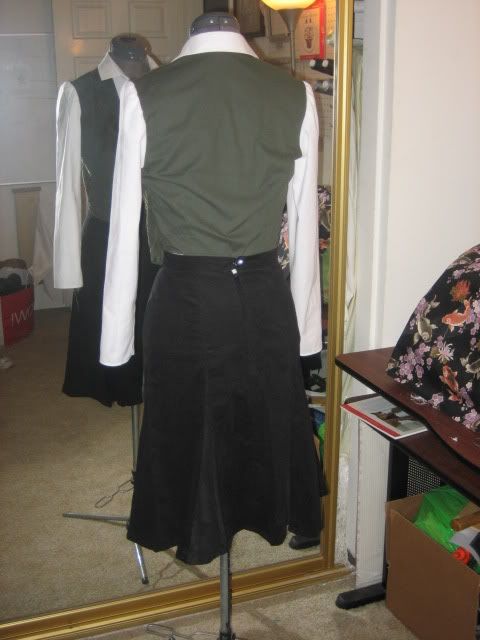
The dummy that is serving to model this ensemble is not the dummy that was used to drape the pattern, so it doesn’t fit quite right particularly on the back but it serves the purpose. As you can see, the vest front and the skirt are both corduroy.
Again, that vest is attached to the shirt at the shoulders and the sides. The front of the garment features the white broadcloth and the olive green corduroy, while the back from the waist up is the olive green broadcloth with white broadcloth on the bottom, giving the illusion that the garment is a 2-piece. I was tickled pink to find that the 2 olive greens I had in my stash could work for this project, particularly since they were bought years apart! The sleeves feature a tiny puff at the top, adding to the illusion that the vest is not part of the shirt.
I was incredibly happy with the resulting pattern for this outfit as everything lined up beautifully. Because the pattern was so precise, it was literally a simple matter to assemble the thing. That said, there were a few areas I could have done better with.
Because of time constraints, I did not put cuffs on this. Given the entire rest of the outfit, it really should have had cuffs.
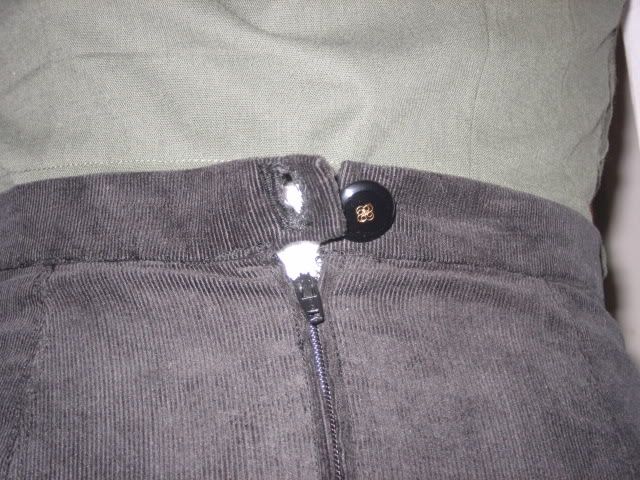
This zipper and button flap combo is horrible. The gap is rather large, leaving you to see the shirt (or underwear) beneath the skirt. This problem is mainly due to my own poor work with the zipper. Had I placed the zipper in the correct spot, I think this could be much better. Then there’s the lack of a button flap. I got around this by using an invisible zipper, but really this should not have used that sort of zipper and should have had a zipper flap. This is the larger reason why there’s a big gap at the top of zipper. Poor planning and lack of foresight here. In addition, I made the mistake of using a vertical button hole which is 90% of the width of the waistband. I should have used a horizontal buttonhole here.
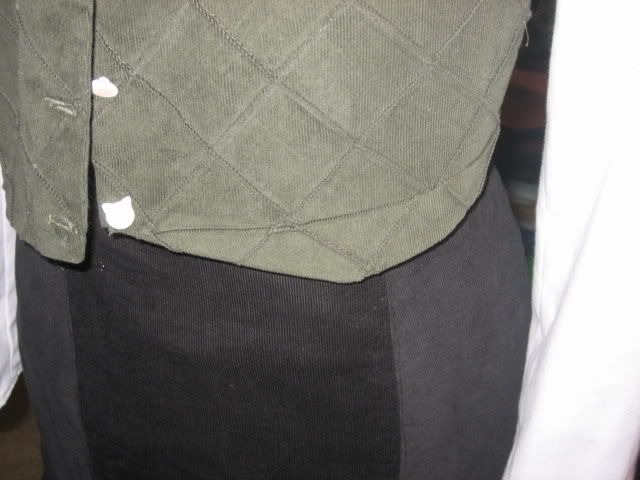
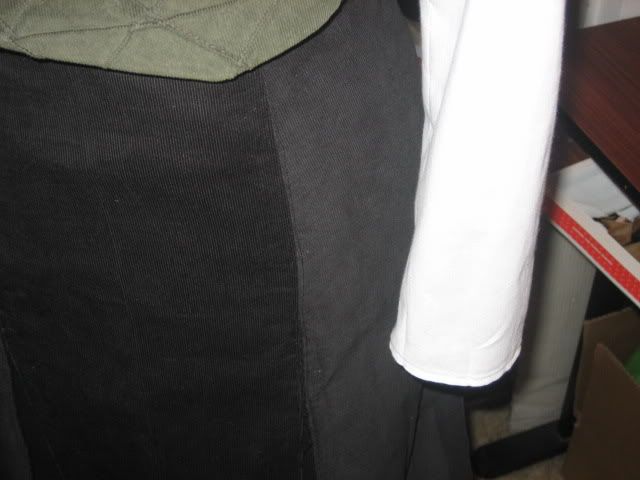
I had a very tiny amount of the green corduroy with that nifty pintucking pattern on it (yes, I bought it like that), so when I screwed up the cut on the first attempt and had to throw that away, I didn’t have enough to cut both sides of the front again. This means the left side was pieced together, but fortunately only at the bottom edge. You can see the horizontal line where I tried to match up the pintucks. It actually doesn’t show that much, but it really bothered me. In addition, I forgot completely that corduroy does have a nap to it. To try and conserve material, I cut 1/2 the skirt panels in 1 direction and the other half in another direction. When assembled, it became immediately obvious what the mistake was. You can see it here in the one panel being very black and the 2 other panels looking more grey? Yeah… oops.
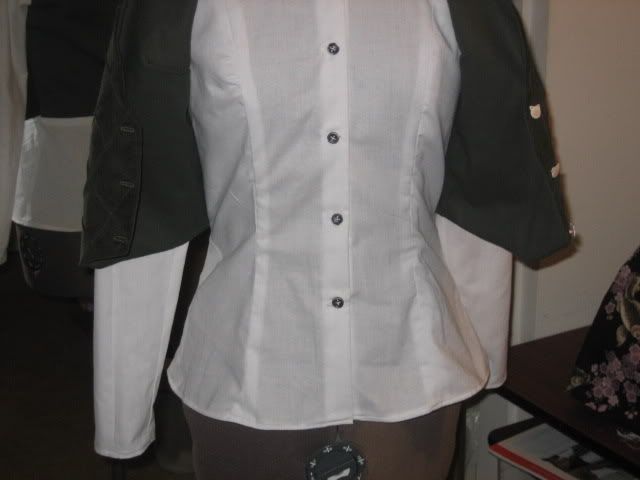
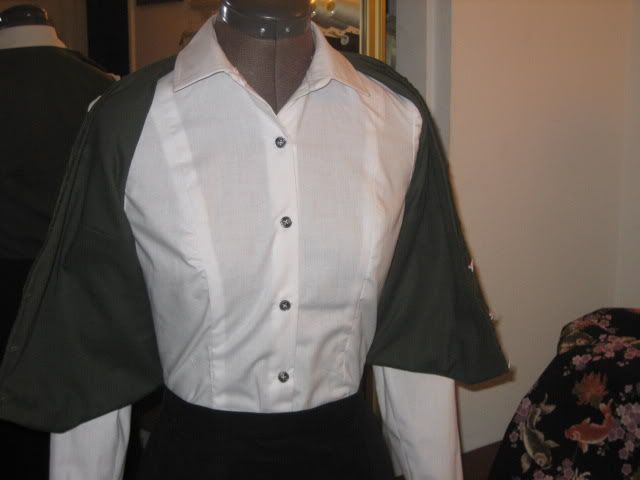
Removing the skirt, you can see that the shirt is a fully fitted garment. Opening the vest, you can see the princess lines on the shirt. Given that the vest completely covers this feature, it was not particularly necessary but using the princess cut added a great degree of complexity to the shirt, which I wanted.
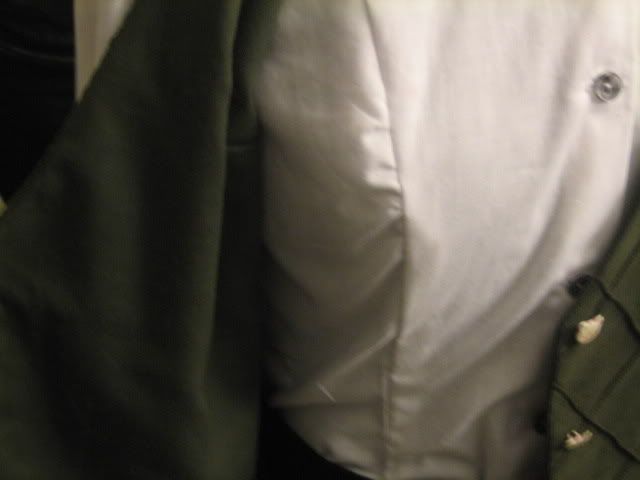
Invariably, the side that I sew first will not be as good as the side I sew second. The princess seam here is no exception. There is some ease built into the over-bust part of the seam and I screwed up the distribution of that ease through the 4″ window, resulting in a lumpy seam line. Again, the vest covered this so it’s not obvious but I know it’s there and am not happy with the poor attention to detail here. Of course, I could have ripped it out and redid it, but I generally push things to the wire deadline wise and didn’t have the time to fix this sort of mistake. Ditto with the zipper placement.
And that was the first project. The project I did for the Pattern Making class did not turn out at ALL. I loathed it to the degree that I threw it away when I got home, so there won’t be a post mortem for that project. I have pictures from the Draping II 1st project, which again I hate but I learned enough the second one I like much more and the 3rd one I’m likely going to LOVE. As soon as I can find the battery charger for the camera, I can pull the pictures off and do a quick post mortem. The camera died before I could get close-ups of it, so the errors aren’t as visible as I’d like for post mortems.


Nicely done! What is the shape of those buttons on the vest?
The buttons on the vest are little kitty heads. I bought all these cat themed buttons back when I was showing cats and had planned to use them on show curtains and show vests and the like. Now? No idea what to do with them, so used some here. They were a big hit, particularly with the Japanese Kawaii crowd. hehe
Nice work, and nice post-mortem. Since you know what went wrong, you know where to improve for next time.