Posted by dravon in LiveJournal, Project Review | Comments Off on The Very Hideous & Failed Fitted Shirt
The Very Hideous & Failed Fitted Shirt
Long ago, so long ago I can’t remember when but BEFORE I started any of the construction classes at SMC, I found this amazing emerald green material. Soooo soft! I love soft. So I bought a few yards figuring I’d make myself a shirt. From there, it pretty much went downhill. I think this shirt is actually a much stronger testimony to just how dramatically I’ve improved. Dramatically. While this project is BEYOND “failure”, it did yield a whole lot of valuable lessons. While it’s awfully tempting to sweep this one under the carpet and pretend it never happened, I think the value of failures comes from examining them and learning what not to do. So try not to laugh too loud or gasp too often in horror. LOL
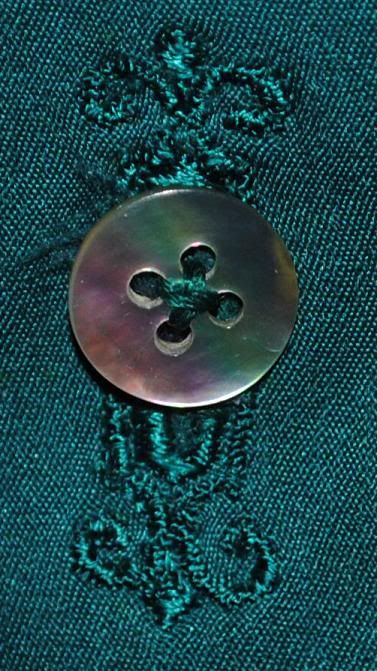
Here was the one success for this shirt: artistic button holes! Since I had just gotten the fancy embroidery machine, I wanted to practice button holes — this would require some precision placement! Placement has me leery, so forcing myself to do a straight line of vertical button holes on the center front PLUS the button holes on the cuffs, oh yes. Challenging. And I was pleased as punch with myself for doing it WELL! *throws confetti* The below image shows the markings that I used to line it up and properly place it.
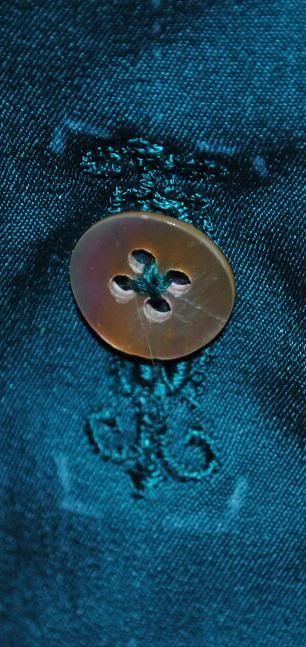
But this image gives you a better idea of what the decorative button hole looks like. I was further thrilled to find that my little buttonhole cutting chisel looking thing was perfectly sized and worked beyond amazingly well. I’ll need to find a set of those in all different sizes because the one I have is 1/2 inch. I suppose I can make do, but I do plenty that are smaller than that and I loath using the seam ripper to open up the button holes. I’ve ruined more button holes that way! heh
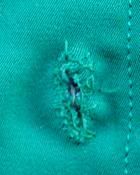
Alas, my euphoria at have done so nicely on the placement and everything was short lived. You see, I failed to plan ahead and by so doing failed to realize that another layer of material was going to go underneath all my pretty little buttonholes: the shirt placket. This means I had reinforced only one of the layers which the buttons would eventually need to go through in order to close the shirt. DOH! And so while the front of the buttonhole was all pretty and snazzy, I had to add some hand-done buttonhole stitches to the backside once the buttonhole was opened. It’s not very easy because the material wanted to fray immediately, and I got better as I went (honest!) but here’s what the underside now looks like for these:
*facepalm* I later learned, after putting all the buttons on, that the line of holes is too far from the edge as well. Like 1/2 an inch too far. *sigh*
Rest assured, by this point I’m hating this shirt. It taunted me everytime I looked at it. Taunted me with “this is what happens when you take shortcuts!”
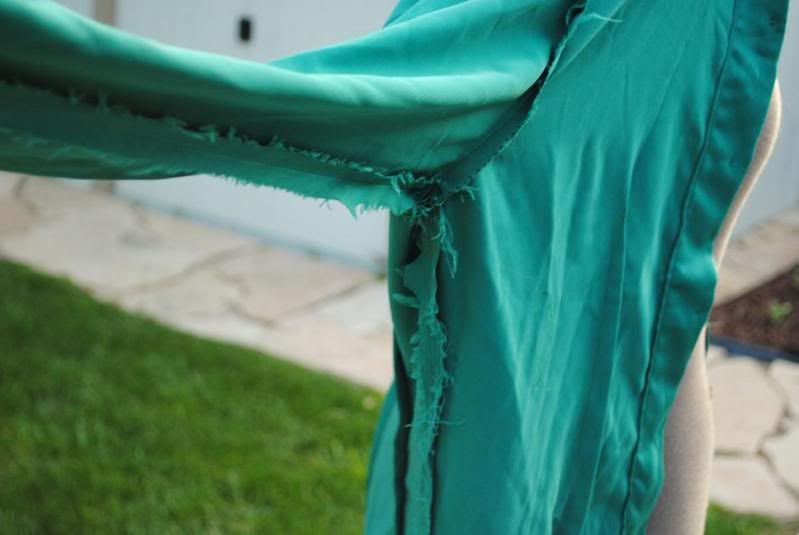
AAAH! *headdesk* Okay okay. Finishing the seam edges is a really really good idea. I get it. Nothing quite says “don’t do it this way” than a really hideous set of frayed edges. yick. Oh but wait. There’s more. This whole “precision sewing” thing was lost on me way back when.


*twitch* Ugh. That’s … heinous. Did I mention all this basic construction was done BEFORE I took the classes as SMC? I wish that could excuse this truly sloppy work, but it can’t. I HAD been sewing for 10 years before the classes. And THIS was the best I could do?? This was acceptable? Oh helllls no. Sloppy, rushed, not-caring. It all shows through and the results are I was really not liking this shirt. After the first construction class I pulled this shirt out of mothballs, was horrified and put it back. “Can’t look at that…” And so, for another 2 years it sat.
Now, at least, I understand why the collar was doing this, and how to fix it. At the time, I didn’t even notice.
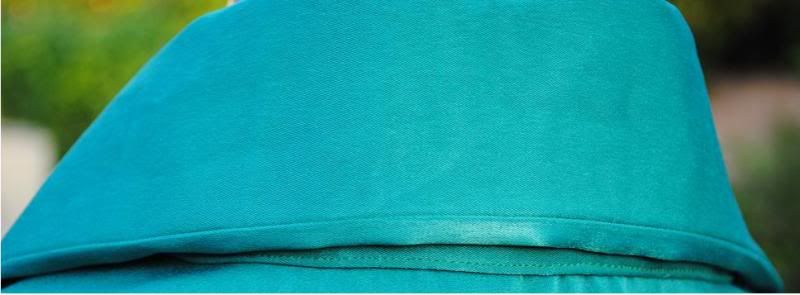
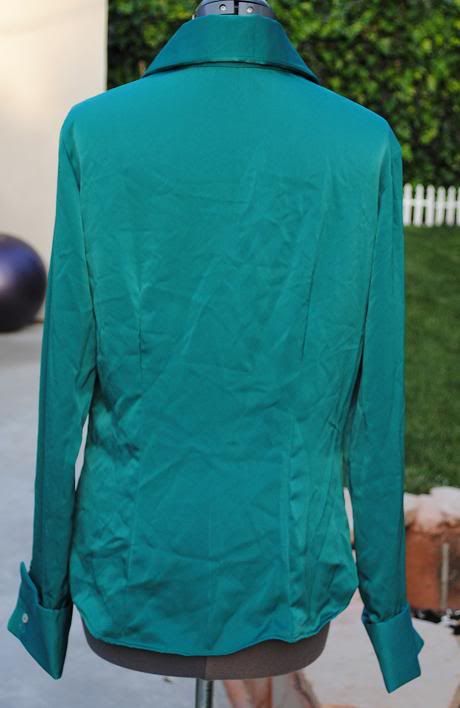
And here is the back of the finished, finally, fitted shirt. It’s a little wrinkly, because it’s been sitting in a package for something like 3 years waiting for me to put the buttons on it and do something about the underside of the buttonholes.
But I didn’t WANT to do a post-mortem with a wrinkly shirt. If I was going to mock myself for shoddy work, the least I could do was iron it. Right?
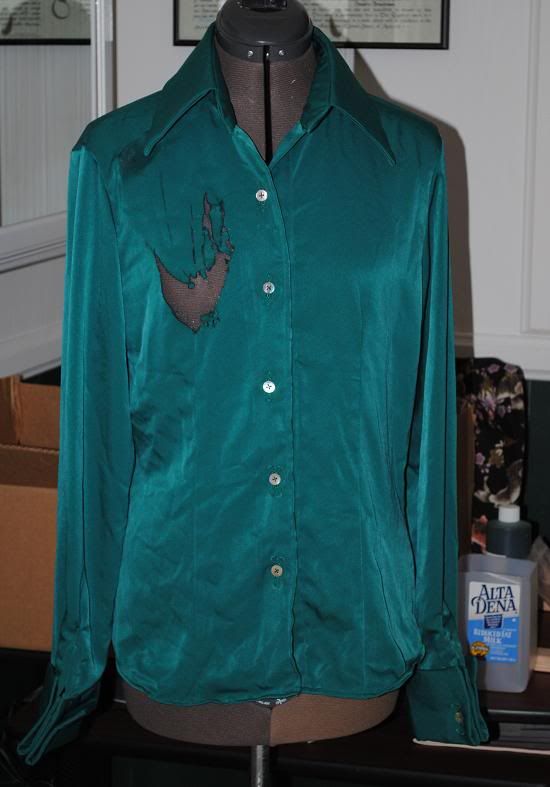
Right. See, this shirt was made of synthetic material and APPARENTLY it’s absolutely true that synthetic will MELT if the iron is hot enough. So, after cringing every time I looked at this ugly shirt with its careless workmanship, after at least 3 years of sitting in the works-in-progress pile, I go to iron it and … melt the center front right chest.

Justice was here this. The material melted and I pulled the iron away in shock. Too late. The shirt … it was dead. And not a whole heck of a lot I could think of to save it. I just laughed. I had to. Really. I guess I truly hated this shirt far more than I realized, and the “accident” took care of the whole mess. The upside?
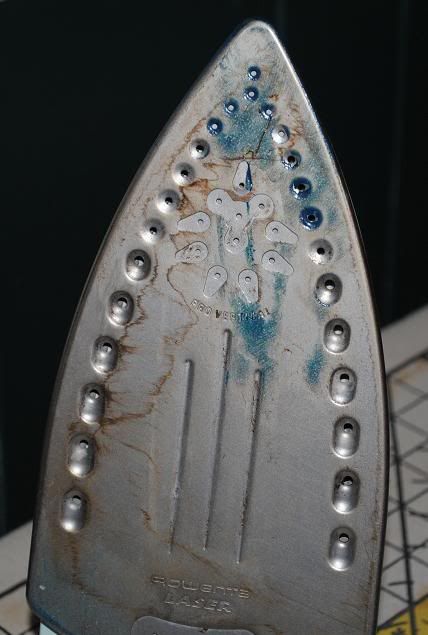
I got a new iron. For whatever reason, melting the material killed the iron pictured.


