Posted by dravon in Education & Instruction | Comments Off on Joining Binding Tapes – Sew on the angle or Sew it straight?
Joining Binding Tapes – Sew on the angle or Sew it straight?

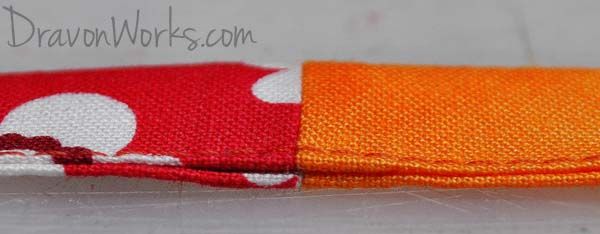
When strips of binding tape are joined together, there are two ways it can be done:
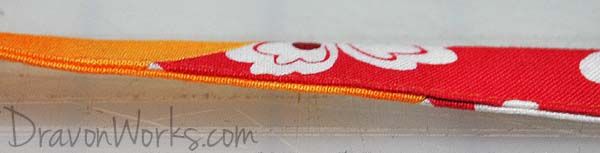
1) Sewn at an angle
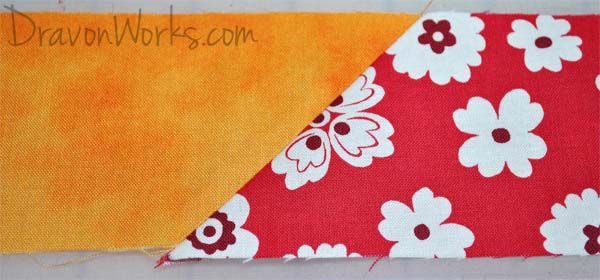
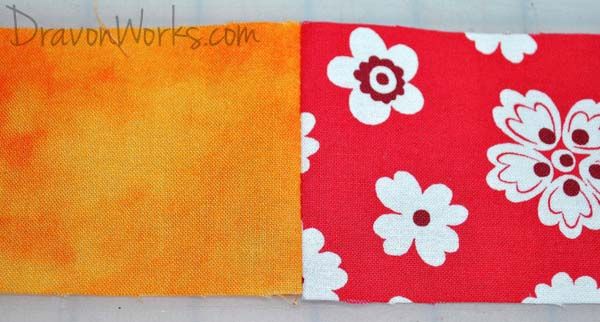
2) Sewn straight
Which way is the one that will work best? You should be used to this answer by now so say it with me: That depends on what you need.
Sewing strips directly together with no fancy angle work is perfectly fine … unless you plan to start folding these strips over themselves. Examples: making binding tapes and also straps for things. The moment you know that you’ll be folding these strips in half or in quarters is when you know that these need be sewn together on an angle.
Why?
For every seam, there are 2 layers of material on each side of the pressed open stitch line.
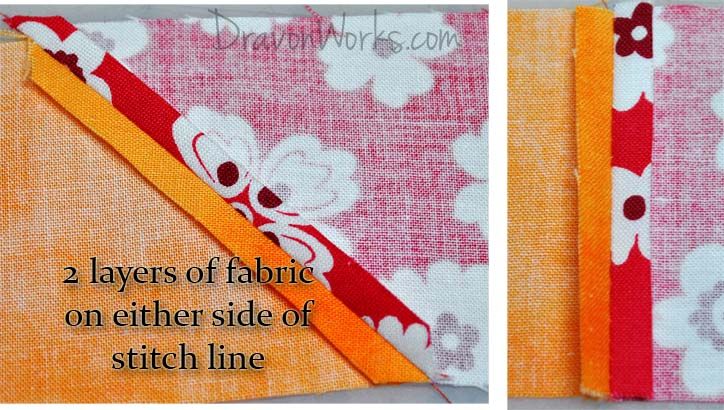
If the strips are sewn together on a straight edge and then folded in half, now there are 4 layers on each side of the stitch line with just 2 layers immediately past where the seam allowance ends. Fold that same strip into quarters, and now there are 8 layers of materials on either side of the seam.
That means there’s now a lump of fabric right at the juncture point. The thicker the material, the more obvious this is going to be.
But if the strips are sewn together on an angle, then it doesn’t matter how many times that strip is folded in half — those seams will never end up laying one on top the other.

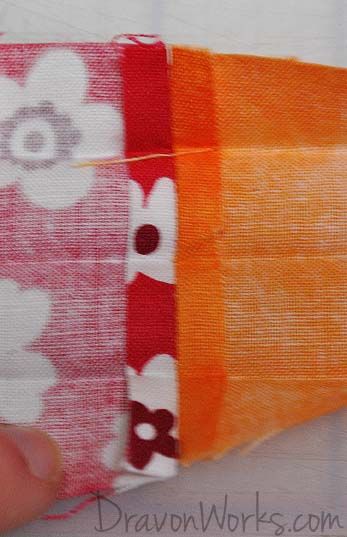
The end result? A distribution of those 4 or 8 layers of fabric across the full width of the strip, and no single bulky spot!
I know that for me I use binding tape all over the place!! I took a while to master the angle sew, but I’ve got it down now and use it constantly. If you’re curious about whether you need tape cut on the grain (binding tape) or on the bias (bias binding or bias tape), that “why” is right here.
Want some help figuring out exactly how to sew these together correctly? The step-by-step picture tutorial is available as a free PDF download here! If you find the tutorial useful, share the link to it on your FaceBook page or other social media account.
Until we meet again, Happy Sewing!
– Dravon


