Posted by dravon in LiveJournal, Project Review | 9 Comments
Basic Apron
This was made from Butterick’s pattern B5551. It was supposed to take 1 hour, but I managed to stretch it across 2 whole weeks.
*sage nod* I’m good like that.
*snerk*
Despite my best efforts, I did manage to finish this one and learned a few things so I figured that a post-mortem was due. Here’s the completed masterpiece:
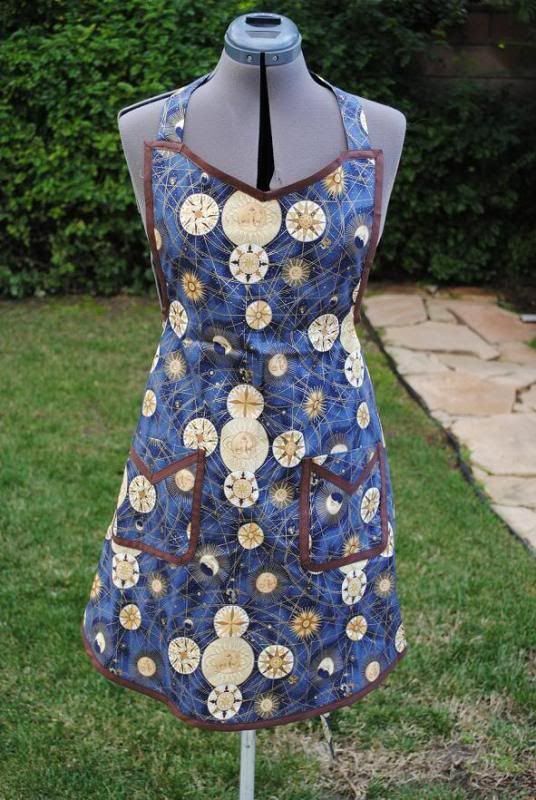
First off, it’s very clear that I don’t really work with patterns very much. In fact, this was scrap fabric that was in my trash pile. It was purchased to make cat show curtains, but even at the time I was like ‘huh?’ for that fate. It seemed more fitting to use the pattern as a kitchen apron, sorta like a twisted homage to the alchemists in their lab. But anyway, it’s very clear that I do not work with patterns because this entire piece is upside down. Notice all the suns? Yeah. Well, I didn’t, though it took M perhaps 2 seconds to start chiding me that all the suns smiled only at me, since only to me looking down at the apron being worn would the suns appear to be right-side up. Doh!
Will I EVER learn about careless error handling????!?? It’s always, consistently, since pre-school, been the number one reason that I don’t do as well as I could. Careless errors. Getting ahead of where I am in favor of where I want to be, and in the process screwing up the fundamentals so that when I finally DO get there, everything’s all wrong. *sigh* At least this careless error is hardly catastrophic. I work very hard to make sure that any such errors are here, where they mean nothing … rather than while driving or horseback riding. eeee. But this is all neither here nor there. Onward!

At least it fits. *LOL* But I do think that the design could have benefitted from a single strap, or at least significantly shorter double neck straps. I mean, how big is my neck supposed to be?! I took an extra belt buckle and threaded the two straps through it so that I could slip it over my head and not have a big old knot or bow on my neck — have enough headaches thank you very little. I do, however, very much like how the apron wraps around the body. That’ll really help with splashes and stuff, keeping them off my clothes. When I wear it, I wrap the lower straps around my waist and tie it in the front.
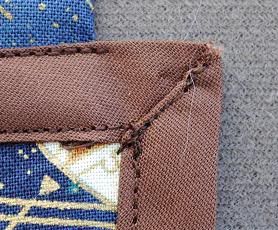
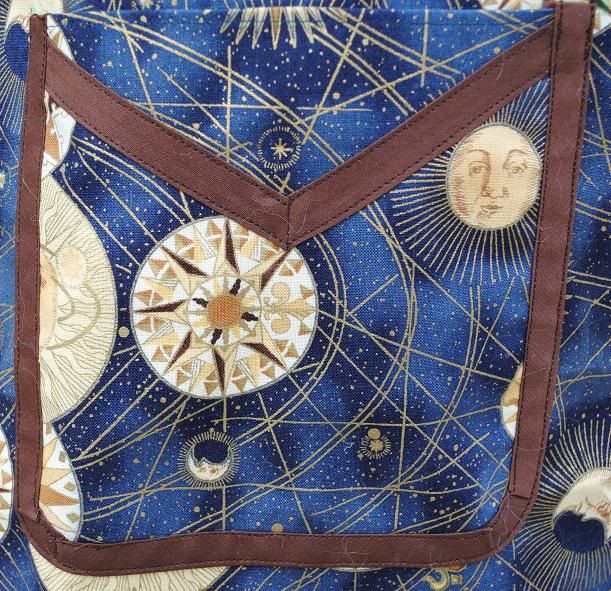
I did learn while doing this that I’m not very good with bias tape. Just not enough practice with it when it comes to corners, or semi-circles (along bottom edge of pocket below). At least this was all extra material from the cloaks project, so I didn’t have to buy a darn thing with this and I still managed to learn some things. I have a cute kittens print fabric, and lots of this brown bias tape. I’m considering making a second apron, to see if I can work out some of the skills better. I’m thinking that for things like the corners and rounded edges, I’d do better to just suck it up and actually thread baste them prior to stitching, rather than trying to make pin basting work. Besides, I can always use the practice with straight seams!! Egad, the stitching around the curves on the pocket is less than inspiring. hrm. At least I made the print on the pockets right side up…
Overall, it’s cute. It fits. I learned where some more definicies in my sewing skill still lie, and figure that if I make the patterns I have in my drawers, I’ll have lots of practice. Maybe I’ll even one day be able to make something in a reasonable amount of time. *lol*


Don’t feel too bad about how long it takes to make something. My flannel nightie project still isn’t done some weeks (months?) later.
On the bias tape, what I’ve found is that narrower will lie better around curves than the regular kind of bias tape from the store, but that means cutting it yourself.
I’ll definitely keep that in mind for the future! Thanks for that tip. 🙂
I’ll definitely keep that in mind for the future! Thanks for that tip. 🙂
I’ll definitely keep that in mind for the future! Thanks for that tip. 🙂
I’ll definitely keep that in mind for the future! Thanks for that tip. 🙂
I’ll definitely keep that in mind for the future! Thanks for that tip. 🙂
Don’t feel too bad about how long it takes to make something. My flannel nightie project still isn’t done some weeks (months?) later.
On the bias tape, what I’ve found is that narrower will lie better around curves than the regular kind of bias tape from the store, but that means cutting it yourself.